

Marijuana grow guide
- Marijuana Grow Guide introduction
- Chapter 1: Types of cannabis & their effect
- Chapter 2: Seeds
- Chapter 3: Life cycle of the cannabis plant
- Chapter 4: How to choose the right kind of strain for your climate
- Chapter 5: Equipment needed for growing
- Chapter 6: How to germinate your seeds
- Chapter 7: Soil and containers include transplanting information
- Chapter 8: Water and pH
- Chapter 9: Light and Lamps
- Chapter 10: Temperature, Humidity, and Ventilation
- Chapter 11: Nutrients needed for each life phase
- Chapter 12: Mildew, pests, and diseases
- Chapter 13: Growing hydroponically
- Chapter 14: Pruning, Topping, Super-Cropping
- Chapter 15: Harvesting
Marijuana Grow Guide introduction
We realize that sometimes growing cannabis can seem daunting at first. But like most things in life, it's just a question of taking it one step at a time and following a good guide. We have more than 25+ years of experience breeding and selling top-quality strains. We've taken our knowledge of growing and created this handy growguide for all of our growers throughout the world.

If you have any questions about growing cannabis, feel free to reach out with your growing questions, we're here to help! If you have any doubts about your grow, for example why your leaves are turning yellow, or are you watering it too much/not enough, or any other question, we suggest you join the wonderful community over at Grow Diaries. On this page, you can document your grow step by step and reach out to the community for any doubts you may have along the way! You'll get expert help for your cannabis growing, free of cost!
So, how does one go about it in growing marijuana from seed? It could be a straightforward process, but undoubtedly, it won’t hurt if we debunk some of the details to the entirety. Follow these dependable steps:
1. Select the cannabis seeds that best suit you
It could be you are in a mountainous climate. So, the best thing to go about it is by choosing the cannabis seeds that best fit that climate. Now, you will need to research and find the weed seeds that do well in harsh weather, and in this case, strains such as the AMS Afghan will best fit you.
Necessarily, your personal preference undeniably comes handy here. You need to think of growing marijuana from seed provided those seeds suit the weather patterns, the conditions to get solved, and your experience level.
2. Have the factors necessitating seed germination ready
It is overwhelming to talk about how to grow marijuana from seed if there is no assurance that the factors that necessitate the ideal germination get cross-checked.
These comprise water, temperature/humidity, air, growing medium, light, and nutrients.
3. Germinate your cannabis seeds
There are different ways to germinate cannabis seeds, as you will see in this guide. This 420 grow guide guide is literally what you need to keep going and fulfill your pot cultivation. Basically, anything you need to achieve, seeing weed at your farm, is incorporated in that marijuana growing guide. Including do's and don'ts. A very useful walkthrough to grow your seeds and to review your methods if you are more experienced.
Chapter 1
Types of cannabis & their effect
Cannabis Indica, Cannabis Sativa, and Cannabis Ruderalis are three species of the genus cannabis. They all belong in the group of plants that have psychoactive properties. However, they differ in both their effects on the user and the way they look.

Cannabis Sativa
Cannabis Sativa grows the tallest of the three. Their buds are airy and they have thin pointed leaves. When you see the signature picture of a cannabis leaf, it is usually the Sativa dominant leaf. Since they grow the biggest, they normally also have the largest yields. The effects you can expect from consuming a sativa dominant strain are energizing, uplifting, increased creativity, cerebral head buzz, increased focus, promotes a general feeling of wellness, and reduced nausea.
Cannabis Indica
Cannabis Indica can be recognized by their short, bushy, and stocky stature. Their leaves are fan-like and the fingers of the leaves are broad. They normally have good genetics to grow thick dense buds. Indica strains are known to have higher CBD content than Sativas.
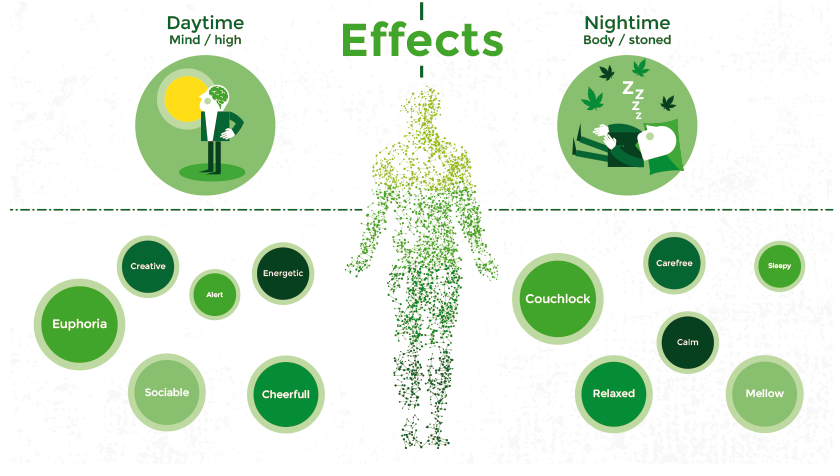
Cannabis Ruderalis
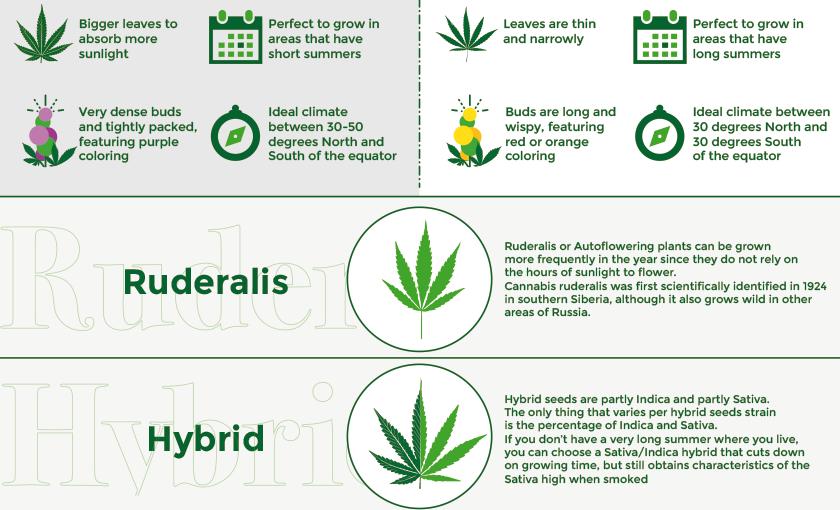
Cannabis Ruderalis is the smallest of the three, and it has narrow palmate-shaped leaves. What really sets cannabis Ruderalis apart is that it switches automatically from the vegetative phase to the flowering stage with age instead of needing the schedule of 12 hours of light, 12 hours of darkness. It also has a shorter growth period so you can have quicker and more harvests per year. These things make it popular with beginners and those without an ideal climate or grow space. Ruderalis does not have a psychoactive effect in itself.
It has been interbred with sativa and indica plants to take on their psychoactive traits but still remains autoflower after crossbreeding. Even though these three species, Sativa, Indica, and Ruderalis come from distinct separate families of cannabis they can all be interbred. In fact, most strains today are hybrid strains. This has allowed breeders to create incredible strains with customized traits.
Chapter 2
Seeds
After you have chosen which type of cannabis suits your needs you will then have to decide which kind of marijuana seeds you want to buy, regular, or auto-flower. Once you understand the difference between the three then it will be easy to decide which one you’ll want to grow.
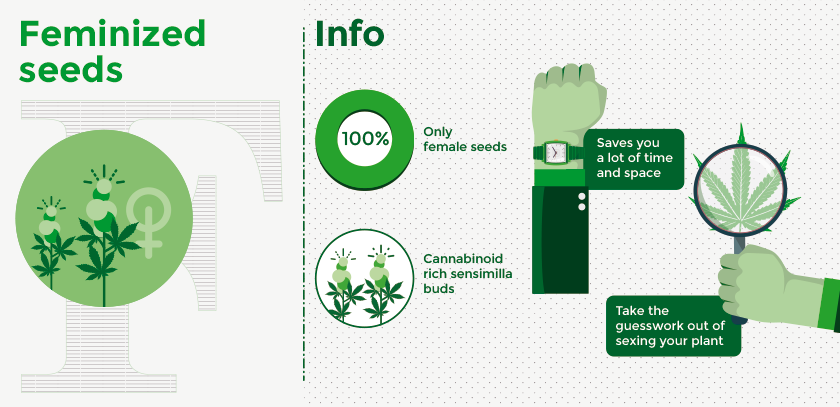
a. Feminized Seeds
The most popular kind of seed is feminized and for good reason. Only female seeds produce the cannabinoid-rich sensimilla buds that growers harvest and you like to smoke. Feminized seeds are produced in, a special way so that they only produce female seeds. Buying feminized seeds will take the work out of determining the gender of your plant and save you a lot of time and space. It’s a terrible feeling when you spend weeks nurturing a plant and it ends up being male.
What’s even worse is that the male plant could pollinate your female plants and you end up without any bud. Also, regulations force growers in certain areas to only be able to plant a certain amount of cannabis, you wouldn’t want to waste it on growing male plants that you end up throwing out. All in all, if you want to have buds, get feminized seeds.
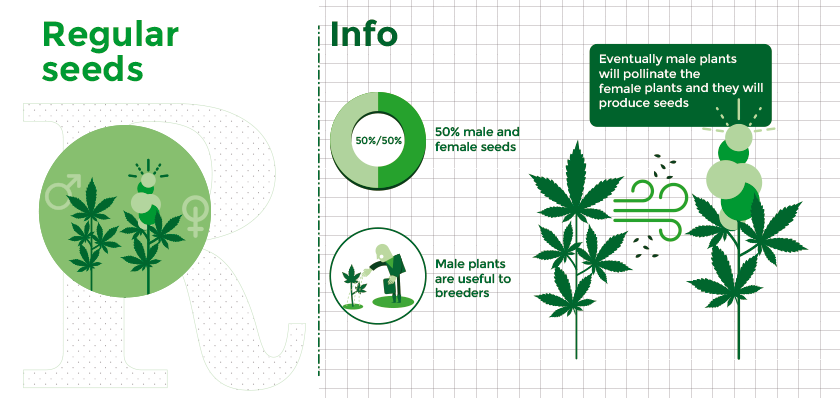
b. Regular Seeds
Regular seeds are a mix of male and female seeds. Naturally, cannabis plants produce a ratio of 50% male to female seeds. There is no way of telling if the plant will be male or female before the flowering phase. When male and female seeds are grown together then eventually male plants will pollinate the female plants and they will produce seeds that make the buds poor quality for harvesting. Male plants are only useful to breeders. You will find that regular seeds are less expensive than the feminized ones, however, it may be worth the extra expense to know that you will have female plants.
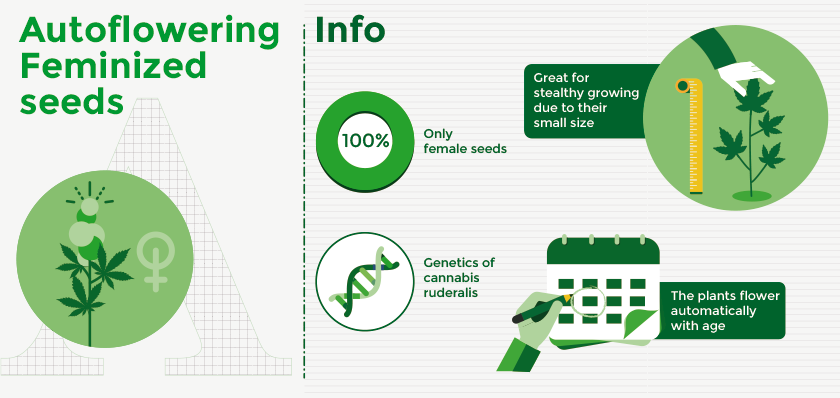
c. Autoflower Seeds
Autoflower seeds are female seeds with the genetics of cannabis Ruderalis to make the plants flower automatically with age. With auto-fem seeds, you get the benefit of feminized seeds along with the benefits of Ruderalis plants. They are easier to grow, they have a short growth period, and they are great for stealthy growing due to their small size. Their size, however, may also be a drawback since they will produce smaller yields.
Chapter 3
The life cycle of the cannabis plant
Knowing how to grow marijuana, begins with understanding the life cycle of this plant. The life cycle of a marijuana plant consists of incredible changes that allow it to go from a small seedling to a large bushy plant with flowers that you can smoke. When you begin to grow it is important to know the stages of a marijuana plant so that you will know what to expect and be able to notice if something is not right. Knowing at which stage your plant is in will allow you to give it the proper nutrients, light, and water so that you end up with a flourishing plant. The four main stages that a marijuana plant goes through from seed until harvest time include: germination, seedling, vegetative, and flowering.
a. Germination
The cannabis plant life cycle begins with high-quality seeds. The seed of the marijuana plant is dormant and needs water to bring it to life. This process is called germination and can start anywhere from 24 hours and can take up to 7 days and sometimes even more. The wet seed will then sprout its taproot and can then be placed in a growing medium. The taproot will grow downward into the growing medium as the stem grows upwards and then two cotyledon leaves will grow from the stem. The cotyledon leaves will take in the sunlight allowing the roots to develop along with the first fan leaves. Now your plant is considered a seedling.
b. Seedling stage
Specific traits define a seedling plant. It must have developed a stable root system and true leaves, which means it has leaves that look like the iconic marijuana leaves we can all recognize. During this stage, a seedling will grow anywhere from 4 to 8 leaves. A cannabis plant can stay in the seedling stage for a broad range of time but normally around 3 weeks. This all depends on environmental factors like the soil, the amount of water the seed gets, the quality and amount of light, and the specific strain that is being cultivated. A healthy seedling will be short with dense vegetation, and it should not seem to be reaching for sunlight. The leaves should look bright and green. During this phase, the seedling is particularly vulnerable to mold and diseases. The seedling’s environment should be kept clean and without excess moisture. Avoid overwatering the seedling as its roots are still small and don’t require very much water
c. Vegetative stage
The next stage in the marijuana plant life cycle is the vegetative stage; this is when the marijuana plant really begins to take off. In this stage, the plant starts to show big jagged leaves and produces much more foliage since it is now able to absorb and process much more nutrients and carbon dioxide.
The growth of the marijuana plant will mainly depend upon the rate, that the leaves can gather sunlight and undergo photosynthesis. This is why during the vegetative stage you will need to give your plant about 18 hours of light if it’s grown indoors. It’s at this stage that you can begin topping and training the marijuana plants.
Your plant will need lots of nutrients in this stage such as higher levels of nitrogen. You will also need to give it more water and not just close to the stalk but around the plant as well so that its growing roots get water too. It is during this stage that it is possible to determine if the plant is male or female based on the pre-flower located at the nodes. As soon as you are able to determine the gender of the plant you will need to separate the males so they don’t pollinate the flowering female plants.
The pre-flowers that you are looking for are found at the “V” where the plant’s stems come together at the main stalk. You may need to check different locations on the plant since the pre-flowers show up at various places, especially closer to the top of the plant. The male plant will have very small spade-shaped (spade-liken a deck of cards) pre-flowers. When the plant matures, these spade-shaped preflowers will become pollen sacs and look like a bunch of grapes. The pre-flowers on a female plant will not look like a spade, instead, they will be long and narrow. Eventually, a white pistil will begin to stick out from the top.
d. Flowering stage
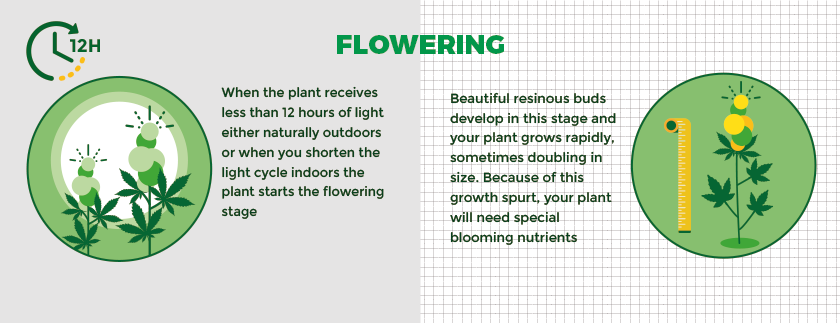
The flowering stage is the final stage of the marijuana plant. It’s the one every grower anticipates the most. When the plant receives less than 12 hours of light either naturally outdoors or when you shorten the light cycle indoors the plant starts the flowering stage. Beautiful resinous buds develop in this stage and your plant grows rapidly, sometimes doubling in size. Because of this growth spurt, your plant will need special blooming nutrients and you may need to use a stake or trellis to give your plant support as it develops buds. The trichomes on the buds will let you know when the marijuana plant has reached full maturation you can begin the harvest.
Every stage of the marijuana plant has its own unique characteristics. Knowing the stages will allow you to give your plant the right nutrients along with an environment that will allow it to flourish.
Chapter 4
How to choose the right kind of strain for your climate
At this point, you may be questioning which seeds are best for your climate. Sativa, Indica, or what type of cannabis should you plant that will prosper best where you live?
Know your climate
You should become familiarized with the climate you plan on growing in. I mean, not just knowing from living in it, but learn about the yearly average temperatures and weather patterns. You will be playing weatherman for the growing season so you need to predict wisely what climate you will be dealing with. The temperature, exposure to sunlight, seasonal changes, and altitude all play an important role in your marijuana plant’s life cycle. Most often, March and April will be the best time to start germinating.
This is because when your plants are flowering it should be around August to September; that’s when the hours of daylight begin decreasing. This is different for autoflowering plants since they can be grown more frequently in the year since they do not rely on the hours of sunlight to flower.
Different strains prosper in different climates
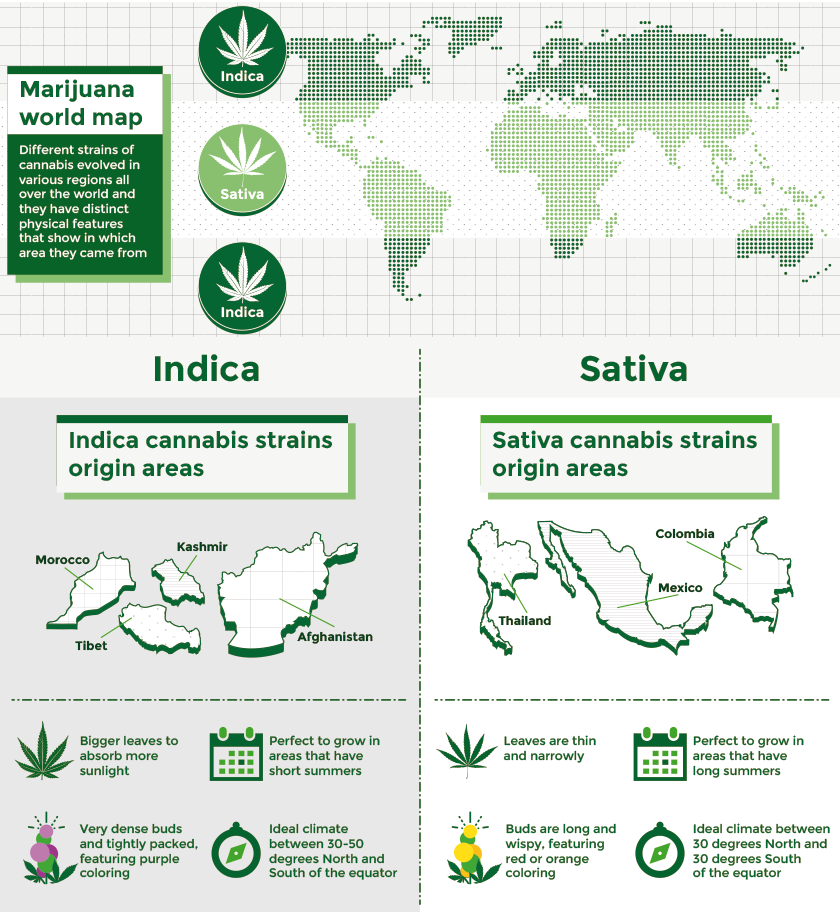
Because different strains prosper best in particular climates, it wouldn’t be smart to plant a seed that grows best in cooler regions if you live in sunny Florida. Different strains of cannabis evolved in various regions all over the world and they have distinct physical features that show in which area they came from. For instance, strains that evolved from tropical areas have smaller leaves and lots of flowers. If a strain originatedfrom the Middle East or from Central Asia it will have bigger leaves with very dense buds.
One of the main reasons behind this evolution of strains is the amount and the intensity of sunlight the plant receives. A plant that doesn’t get a lot of sunlight will have larger leaves so that it has more surface area to absorb as much sunlight as it can possibly get. If a cannabis strain has small leaves then it’s most likely from an area that receives plenty of intense and steady sunlight, and it doesn’t need leaves with a large surface area to absorb extra sunlight.
You may think that leaf size won’t make much of a difference in your harvest, but if a plant gets what it needs, enough sunshine and whatnot, it will flourish best. If you live in a region with weak sunlight or where it rains often, then you will want to choose a type of marijuana that has a larger leaf size so that it can get enough sunlight to produce big buds for you.
Indicas, Sativas, and Hybrids all flourish best in their own different favorite regions as they all have unique physical features that allow them to cope in various climates.
The best climate for Indica strains
Indica cannabis strains originated in areas around Morocco, Tibet, Kashmir, and Afghanistan. Because Indicas have a shorter growing season than Sativas, they are perfect to grow in areas that have short summers. Locations between 30-50 degrees North and South of the equator will have an ideal climate for Indicas. So, if by springtime the ground in your area is still frozen, then an Indica strain may be the type of strain you should go for. Since it grows in a shorter amount of time it doesn’t need a long summer to fully mature.
The best climate for Sativa strains
Sativa strains vary greatly from Indicas. They originated from tropical places like Thailand, Colombia, and Mexico. Ideally, locations between 30 degrees North and 30 degrees south of the equator are where they flourish best. Although they come from the tropics many Sativa strains can also grow in cold temperatures if they get everything else they need like nutrition and sunlight and a bit of TLC. Since their leaves are thin and narrowly shaped you can guess that this strain needs more sunlight than an Indica.
It’s possible, that your personal smoking preference is, that you like how Sativas makes you feel, but you don’t have a very long summer where you live. In these kinds of cases choose a Sativa/Indica hybrid that cuts down on growing time, but still obtains characteristics of the Sativa high when smoked.
If you live in a temperate climate like in the Northern part of the USA, Eastern Canada, Northern Europe, or Southeast Australia then look into seeds like Purple Power, Lemon Ice, Light of Jah, or Happy Outdoor Mix.
There are some strains, that can even grow well in dry climates like in the Southwest parts of the USA, many continents of Africa, and central Australia. These are Durban Poison and Haze.
If you live in a cold climate where there can be a big difference in the minimum and maximum temperature in 1 day, like in someplace in Northern Europe and Canada, then strains like Early Misty, Purple Power, Lemon Ice, and Happy Outdoor Mix could work for you. Tropical climates are great for growing marijuana, there are many strains, that grow easily in these regions. Just to name a few, Light of Jah, Waikiki Queen, Strawberry Ice, and California Skunk will all flourish in the tropics.
Using this information, you will be able to get an idea of which kind of cannabis will do best in your climate. When you are growing indoors, you can pretty much grow any kind of cannabis as long as the growing space permits it.
Chapter 5
Equipment needed for growing
Most cannabis growers prefer to cultivate their plants indoors following the unpredictable weather patterns at different times of the year. However, to achieve fully grown and potent indoor grown plants incorporate the usage of different pieces of equipment. Let’s delve into the requirements that necessitate the entire process.
A grow room
Depending on your financial capability, you may opt to either use a grow tent or an indoor room for growing cannabis. The number of plants you want to grow can also be used to determine the size and type of growing equipment required. The grow room should be completely covered so that the plants do not receive light from the sun, instead they will get light from your lights.
Ganja Seeds
The most obvious thing you will need when growing marijuana is the marijuana seed itself. The first step to ensuring that you get potent and high-quality marijuana seeds, via purchasing them from a reputable dealer. Now, you may be wondering how and where you can get the best marijuana seeds. Your search should have come to an end at this moment.
Amsterdam Marijuana Seeds has the highest quality seeds that have been carefully bred with the finest genetics. These incredible seeds can easily be ordered from amsterdammarijuanaseeds.com and rest assured that your goodies will reach you discreetly. Seeds play an essential role in determining the overall equipment required to have quality plants. For instance, individual ganja seeds give rise to strains that require certain light intensity, intensity, or watering techniques.
Planting pots, and mediums
Now that you have your seeds with you, it is high time to ensure that they get germinated. The planting pots can be in the form of glass cube compartments to help you by checking the progress of the plants and their level of water consumption. If you like it more when you use natural pots, there are some made of clay, and work fine as well. Cannabis cultivation soils aid in giving the plants the desired nutrients without subjecting them to overfeeding. In the case of nutrients, you can use nitrogen-filled fertilizers to help the plants get the most nutrients. However, it is crucial to ensure that the plants don’t get excessive nutrients as that leads to nutrient toxicity. Some growers prefer using hydroponics to growing in soil. Unlike soil mediums, growing hydroponically uses no soil at all. As the name suggests, they require water and nutrients to give rise to cannabis plants. The pros and cons of growing hydroponically can be found in, chapter 13.
Watering equipment
You desperately require watering vessels and water filters to help by removing any toxic chemicals that can inhibit efficient growth. The water to be used should be as clean as possible. If you want to have the best bud from your plant then you definitely, want to have good water. Remember that the water also affects the pH of the plant’s environment, so it is important to make sure that our water is on point with that.
Lighting equipment
Light is among the most primal factors required in growing cannabis. That said, you should invest in a good lighting system. Your lights need to accommodate your plants during the different life stages so that they get the right light spectrum at every stage. The lamps to purchase depends on the size of the growing medium. These lamps should, therefore, help in turning power into readily consumable energy by the plants.
A thermometer
Some lamps end up producing more heat than others. In the long run, the grower can end up having poorly progressing plants due to too high or too low temperatures. A thermometer is a cheap piece of equipment that can help make a difference in your plant’s health.
Ventilation equipment
Providing optimal airflow in your grow room is among the best ways to ensure that cannabis plants get subjected to their best growth conditions. The same case applies to take care of the feelings of the neighbors. Some don’t like it when they get subjected to strong cannabis odors. Proper air circulation equipment helps in bringing fresh air and doing away with the odors produced by the flowers. A carbon filter may be used to weed out these strong smells. If you decide to use the grow tent, it has a myriad of fans, a dehumidifier, and temperature control equipment. Humidity and ventilation have close relationships in growing cannabis, an extraction fan can help in lowering temperatures. The plants can as well photosynthesize well as they receive substantial amounts of fresh CO2.
Chapter 6
How to germinate your seeds
The first job of a grower after obtaining the seeds is germination. This is a very important step because if it's done poorly then you end up with expensive seeds and no plants. Now let’s have a glance at what exactly cannabis germination is. The popping of cannabis is the process in which weed seeds get made to sprout a seedling. In fact, it is the first step in the cannabis life cycle. Nonetheless, you may be wondering where you can get these weed seeds from. Online seedbanks like the Amsterdam Seed Company breed, ship, and deliver marijuana seeds to the customer. When the buyer gets their order, they ought to subject the seeds to certain factors so that the germination process may start.
Such elements comprise:
- Sufficient water
- Light
- Oxygen
- Warm temperature.
What to know before purchasing cannabis seeds for germination
Curiosity may end up luring the grower into unimaginable heights. To germinate cannabis, however, it is worth buying seeds backed by good genetics. Where you purchase your seeds matters a lot. You need a credible breeder, which is why Amsterdam Seeds has your back for quality and mature seeds. The seeds should feel hard and dry. Psychological preparedness is also key. For example, it is worth noting that a 100% germination rate does not usually happen. It would undoubtedly be over-expecting to think that out of 10 marijuana seeds, all of them would sprout.
Starting the germination process
There are different methods that you can use to germinate weed. However, the most successful one we have found is the paper towel method. Cleanliness is critical. Dirt may end up inhibiting the optimal growth of these seeds. That said, it is fantastic to use plastic gloves when handling the seeds as opposed to using bare hands. Exercising patience is also critical. Some marijuana seeds tend to take longer than others to germinate. Cannabis seeds can take up to 7 days or longer to germinate.
Materials needed for germination
You will need the following materials:
- 2 plates
- Paper Towels
- Distilled Water
- Good soil
- Tiny planting pots
- Lighting
Germination instructions:
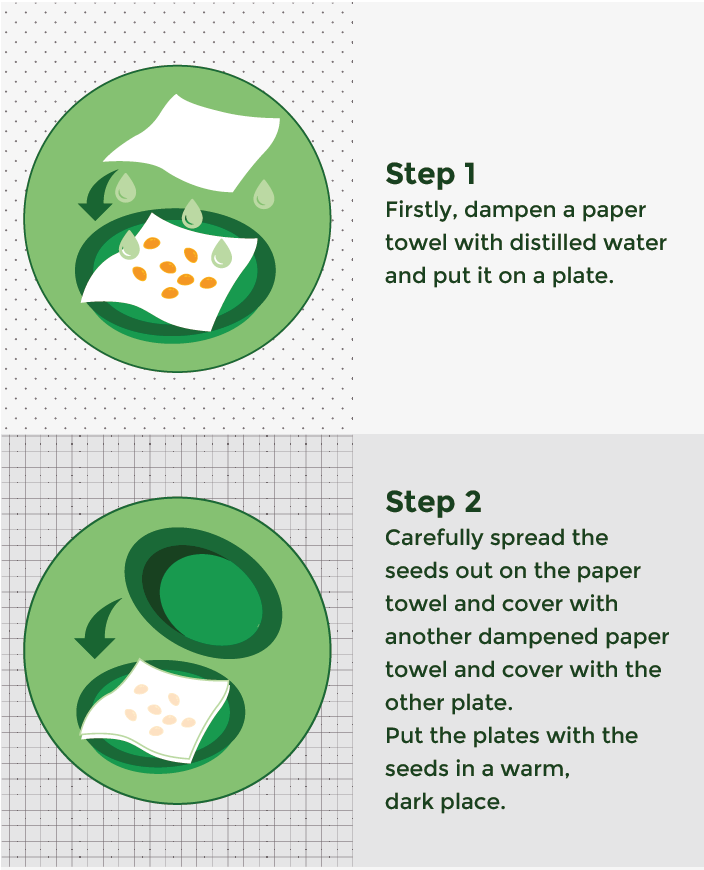
Firstly, dampen a paper towel with distilled water and put it on a plate. Be careful not to soak the paper towel as this will prevent the seed from getting oxygen and it will ultimately rot. Carefully spread the seeds out on the paper towel, and cover with another dampened paper towel, and cover with the other plate. You should put the plates with the seeds in a warm, dark place. The most favorable temperature to germinate your seeds is between 72-78 degrees Fahrenheit, or 22-25 degrees Celsius.
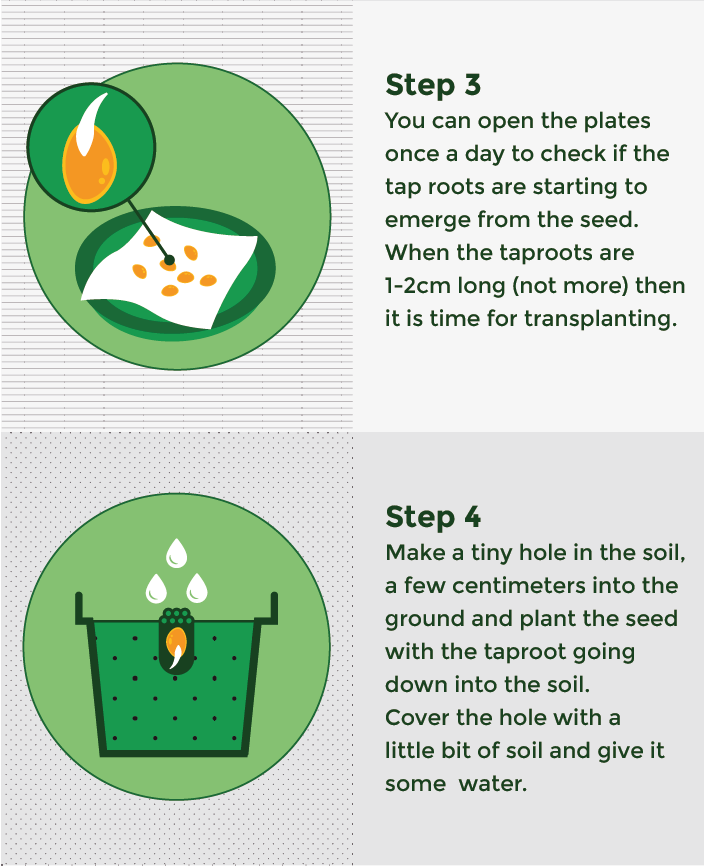
You can open the plates once a day to check if the taproots are starting to emerge from the seed. Take notice that some seeds will sprout rather quickly while others need a week or even a bit longer to germinate. Every 3 days or so, if the paper towel starts to feel a bit dry then spray some more distilled water on top. When the taproots are 1-2cm long (not more) then it is time to transplant them to the little pots filled with soil.
Make a tiny hole in the soil, a few centimeters into the ground. You can now plant the cannabis seed with the taproot going down into the soil. You need to be sure that you plant your seed correctly or else it will not survive. Cover the hole with a little bit of soil and give it some water. Make sure the seed remains covered after the water is added.
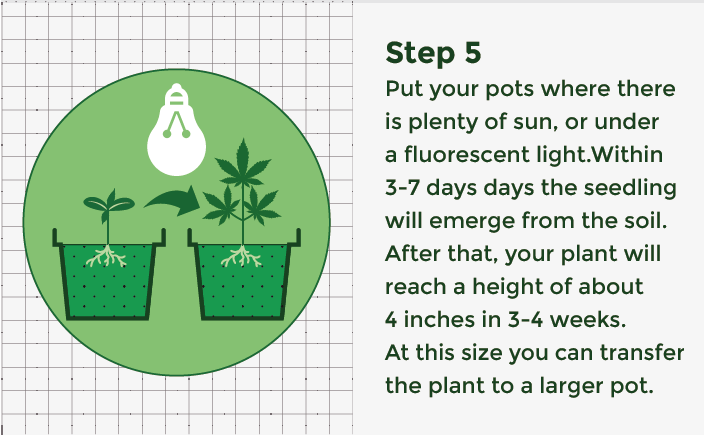
Be sure to put your pots where there is plenty of sun, or create your own light with fluorescent lights. Be sure that the plants do not dry out, but also avoid over-watering. Within 3-7 days the little marijuana seedling will emerge from the soil. After that, your plant will reach a height of about 4 inches in 3-4 weeks. At this size, you can transfer the plant to a larger pot.
Chapter 7
Soil and containers include transplanting information
Your growing medium is another important part of your setup. Opt for organic soil that is airy as your soil needs to drain well. You can even add some perlite or sponge rock to increase drainage. Being frugal when it comes to buying quality soil won’t pay off in the long run, Poor quality soil can have parasites in it and it can jeopardize your entire grow.
Don’t use one full of nutrients as your seedling will need different nutrients than when it is an adult. Instead, you will need to add your own nutrients to the soil. AMS’s Flower Power Fertilizers provide the necessary nutrients for your cannabis plant in every stage. Use the pH tester to ensure that the soil’s pH remains between 6-7.

Start your plant in a small pot
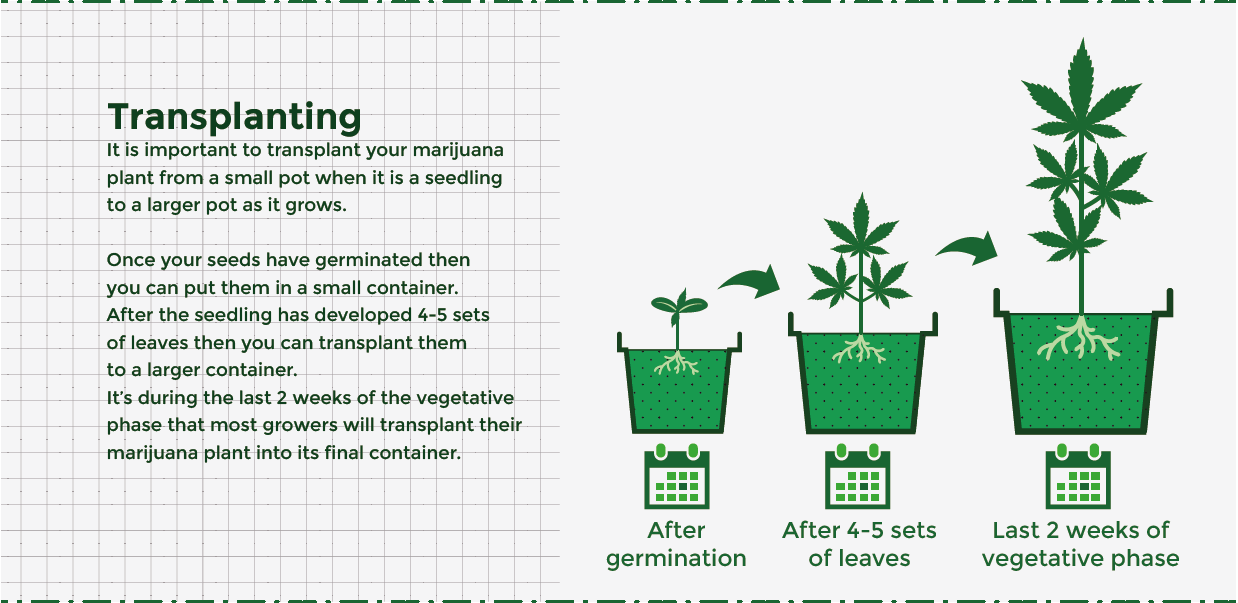
It is important to transplant your marijuana plant from a small pot when it is a seedling to a larger pot as it grows. If you start off your seedling in a large pot then the tiny roots will be sitting in a large amount of soil not being able to absorb all the moisture. This is a problem as it can lead to root rot. When you are looking into the size of containers to plant your marijuana, take into consideration that the biggest limitation for its overall development is root expansion. In order, for your plant to reach its full potential its roots will need to be able to fully expand.
Change pot sizes with the plant’s life stage
Once your seeds have germinated then you can put them in a small container. After the seedling has developed 4-5 sets of leaves then you can transplant them to a larger container. It’s during the last 2 weeks of the vegetative phase that most growers will transplant their marijuana plant into its final container. During the flowering stage, your plant will grow exponentially larger and if it becomes root-bound it will have a direct negative impact on your yield. If space permits it, you should opt for a 5-gallon sized container to ensure that your flowering plant has enough space to flourish.
Rootbound signs
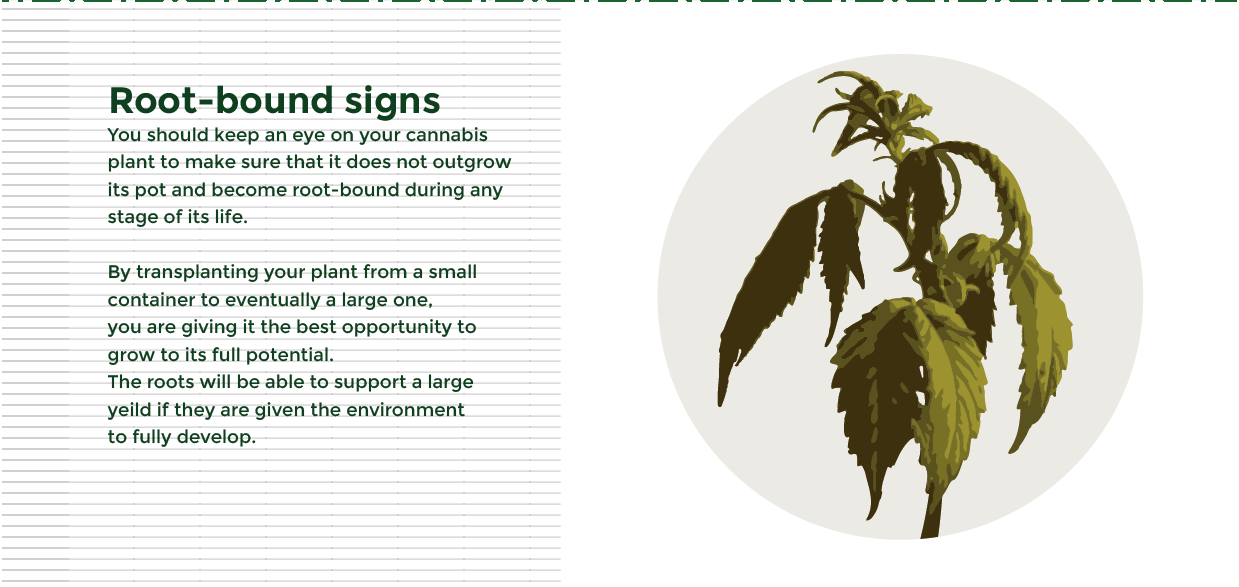
You should keep an eye on your cannabis plant to make sure that it does not outgrow its pot and become root-bound during any stage of its life. Typical signs of a marijuana plant being root bound are:
- Red stems
- Stunted growth
- Nutrient sensitivity
- Stretching
- Wilting, as if it looks underwatered
- Small and lower bud production
- Appears to need watering too often
By transplanting your plant from a small container to eventually a large one, you are giving it the best opportunity to grow to its full potential. The roots will be able to support a large yield if they are given the environment to fully develop.
Chapter 8
Water and pH
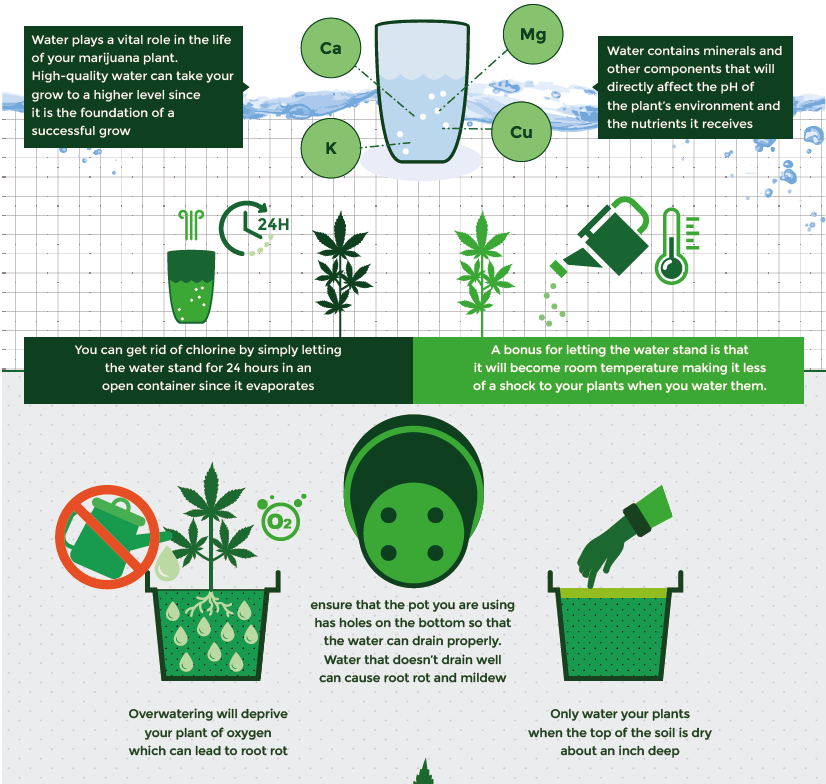
Water plays a vital role in the life of your marijuana plant. High-quality water can take your grow to a higher level since it is the foundation of a successful grow. Not enough water, too much water, and poor quality water can all cause the death of your plant, so it is important to know what is in your water and your plant’s water needs.
The quality of water varies according to your source and where you live. Water contains minerals and other components that will directly affect the pH of the plant’s environment and the nutrients it receives. One of the components that are added to the water supplied by cities is chlorine. Chlorine is bad for your plant, but luckily you can get rid of chlorine by simply letting the water stand for 24 hours in an open container since it evaporates. A bonus for letting the water stand is that it will become room temperature making it less of a shock to your plants when you water them. If your water source has a lot of chlorine in it then you should consider buying anti-chlorine drops which can be found at most pet shops.
Water your plant correctly
When you water your plant be sure to be thorough. Pour water evenly around the soil, making sure that the water gets all the way to the deepest roots. If the bottom roots do not receive water then they will begin to turn upwards attempting to get to the water. Another important thing to note about watering your plants is that you need to ensure that the pot you are using has holes on the bottom so that the water can drain properly. Water that doesn’t drain well can cause root rot and mildew. As a new grower, you may have the urge to constantly give your plant water, but avoid doing this, or else you risk killing it. Overwatering will deprive your plant of oxygen which can lead to root rot. Only water your plants when the top of the soil is dry about an inch deep.
Your plant’s pH is important
Measuring the pH of the runoff water will tell you how alkaline or acidic the plant’s environment is. A grower can purchase special tester drops or a digital pH pen. Marijuana plants like a pH between 6 - 7. If you can get it around a 6.5 then it is best. The pH is especially important because a good pH will help the plant transport nutrients. It’s useless to have a lot of nutrients in your soil if the pH is off because then the plant can’t use the nutrients. If the pH is too high or low then the symptoms can seem like a nutrient problem since the plant cannot use the nutrients in the soil. That is why it is important to keep checking your pH from time to time so that you don’t have a misdiagnosis if your plant experiences problems.
How to fix an incorrect pH
If you find that your pH is too high or low then it can easily be corrected. There are plenty of pH “up” and pH “down” solutions on the market that you can use to correct your pH. However, if you are growing organically there are also some home remedies, that can also work just as well. To make your pH go up you can add powdered lime to your water. To make the pH down and more acidic you can add a tablespoon or 2 of vinegar to a gallon of water and water your plant with it. With either of these solutions, you need to start slow and continue checking the pH of the runoff water until you correct it.
The water you use is the lifeline of your plant. Always be mindful when giving your plant water so that you do not over-water or under-water it. Also, keep in mind that pH plays a very important role in the success of your plants. You can prevent problems with your plant by checking the pH regularly.
Chapter 9
Light and Lamps
Some people like it when they plant indoor cannabis strains as compared to their outdoor counterparts. Either way, cannabis plants require sufficient amounts of light if at all something substantial can come out of them. These artificial sources of light offer valuable merits, just like sunlight does. For instance, they control when the light gets required, and the needful amounts required by each other strain. As a rule of thumb, the more lights get subjected to cannabis strains, the more the plants get bound to give fantastic yields and vice versa.
Factors to consider when buying lamps
You don’t just rise and head to any electric shop and purchase the available lamps for your indoor setting. Some significant elements that can help you in settling for the lamps of choice comprise • Types of grow lights • Best light spectrum when switching the lights • Your budget • Cannabis strains planted Your budget is a self-exclamatory point. For instance, you may have set aside a few bucks to spend on buying lamps, and pay for energy bills that come thereof. It would be critical to ensure that your budget aligns with the total amount to get devoted to the latter.
Types of indoor grow lights
The three most commonly used indoor grow lamps comprise High-Intensity Discharge (HID), Light Emitting Diode (LED), and Compact Fluorescent Lamps (CFL). HID lamps have been used since the recent past, and advancements see to it that they get improved for efficiency day in, and day out. LED lamps are the latest to get used in providing growing lights to indoor marijuana plants. Most growers like their effectiveness and the ability to give relatively higher yields than even the pertinent HID lights. CFL lamps give a white spectrum under most circumstances. They don’t exhibit impressive results, especially when the plants reach the flowering stage.
Light spectrum
You may undoubtedly have met this term. What does it mean? Well, the light spectrum in the cannabis context means the range of wavelengths produced by electromagnetic radiation, which can make cannabis plants sensitive. Cannabis plants tend to react to these wavelengths immediately after getting subjected to them. At the last two phases of the life cycle of the cannabis plant, these plants have different light spectrum requirements. Let’s take an example of the vegetative stage… The plants at this stage require healthy leaves.
The best way to achieve such is via subjecting them to blue light. In this case, 460nm is the optimum spectrum to attain potent leaves. In outdoor growth settings, cannabis plants can get blue wavelengths during the summer. When the cannabis plants get planted indoors, some lamps that can give the blue light comprise T5/T8 and Compact Fluorescent Lamps. In the flowering phase, the light spectrum required should make the plants give rise to potent and huge buds. A red light should get used at this stage and give spectrum levels of 660nm on average. The growers can time their plants to reach their flowering in late summer and get the red light. In the case of indoor settings, the marijuana grower may opt to switch the lights to red immediately when they reach the flowering stage. At this point, the target is to get stretched and heavily-budded plants.
Distance of lamps from plants
Keeping lamps at the right length can fantastically aid in promoting potent plants and enhancing their end yields. The emphasis is on giving sufficient light to your cannabis plants without making them prone to light burn. Some plants require more light than others. That said, it is incredible to ensure that the spacing from a plant to the other is considerate. Let’s take the example of a 250W lamp.
The top parts of the cannabis plant can light up to 20cm. The heat output is under most circumstances manageable since it rarely surpasses 600W. When a small-scale grower uses a 250W lamp per square meter, the plants get sufficient light and uniformly. On the converse, large-scale growers may need up to 1000W/m² to realize substantial yields. This applies in the principle that the more plants, the more light is required. Now, let’s have a glance at the advisable distance of lamps from the different types of indoor lights.
LED lights depend heavily on the diodes used. For instance, if the lamp has fewer diodes, it should be placed close to the plant. Keenness is critical when using these lamps. You may decide to start by keeping the lights approximately 50cm above the plant. Depending on the phase the plant is in, you can control the light by raising them if the leaves tend to bleach and lowering them after great results are achieved. Using CFL is relatively easy. Keeping the lights anywhere between 5 and 8cm from the parental figures is reasonable. Lastly, opting for HID lamps should give convenience. They should be placed at places where the plants should receive fantastic warmth. The grower may use their hand and place the lamp where they feel there is desired warmth by lowering or raising the lights, provided the plants don’t get heat stress.
Chapter 10
Temperature, Humidity, and Ventilation
Growing potent cannabis plants incorporates mastering the art of having these inseparable factors - temperatures, humidity, and ventilation. However, some marijuana growers tend to overlook the latter two and focus on the former only. In this write-up, we are going to break down each of these down.
Temperature
Cannabis plants tend to be choosy on the optimum room growth temperatures. Depending on the cannabis strains planted, the best temperature ranges at almost every phase of the cannabis life cycle need to range anywhere between 20°C and 30°C during the day.
During the night, cooler temperatures like 20°C or slightly lesser works incredibly.

But you may be wondering, “why do temperatures matter this high in these plants?” Well, cold temperatures tend to slow down cannabis plant growth. When they grow insanely low, the plants may as well end up withering. On the contrary, high temperatures may end up changing the potency levels and bud formation, especially in the flowering phase. The roots may as well end up rotting due to the increase in water transpiration in the soil. The main emphasis here is on ensuring that you keep the temperatures as optimal as possible. They should be relatively higher during the day and lower at night. When you interchange between these two, you may end up having changed leaf and bud color.
Humidity
Humidity is a primal factor in the later outcome of the weed yields. If you plant your strains indoors, the outdoor humidity plays a significant role in what the humidity levels show indoors. In the four phases of the life cycle of the cannabis plant, it can’t be wrong to say that humidity plays a significant role in the four. Now that different strains have different specs and requirements, it is worth familiarizing oneself with specific issues. Let’s see them below.

Controlling humidity levels
Firstly, it is worth mentioning that skyrocketed humidity (above 60%) levels bring in unwanted growth like is the case with mildews and molds. They also inhibit the proper absorption of carbon dioxide, which, in the long run, affects photosynthesis to a greater extent. The right way to start this process is via the usage of a hygrometer/ humidistat. The optimal levels should range anywhere between 40 and 45%. When the humidity levels go below these levels, the plants may end up having lowered transpiration rates. The purpose of a hygrometer is to take note of the humidity levels. When there are any mishaps, the grower can introduce a humidifier. A humidifier helps in controlling the humidity levels to normal when they surpass or go below par.
Ventilation
Ventilation and humidity go in handy in the cannabis context. For instance, increasing the airflow where the plants get planted aids in lowering humidity levels. Conversely, reducing airflow helps in upping humidity levels. Ventilation is among the best techniques to employ when faced with pathogens. Well, cannabisplants, just like many other plants, require fresh air every additional time. At each phase, these plants need super air exchange. Under most circumstances, cannabis plants are grown in outdoor settings rarely require artificial forms of air circulation as air and wind tend to circulate freely. It’s an undeniable fact that ventilation aids in controlling odor in cannabis tents and greenhouses.

Indoor ventilation
You undoubtedly require certain things if at all, you would like adequately ventilated cannabis plants. Such include duct tape, an intake fan, and an exhaust fan. An intake fan works fantastically in ensuring that air gets exchanged within a minute and two. You ought to at least ensure that this fan gets placed in the bottom of the tent and connect it to an open place with fresh air. The core function of duct tape is ensuring that the duct system gets held in place to prevent any sorts of mishaps in the quest to ensure efficient flow of air in and outside of the growing tent or greenhouse. An exhaust fan helps in ousting contaminated air. It also aids in ensuring that the plants won’t suffer from windburn arising from excessive air allowed by the intake fan.
In Summary
We ought to mention that not only does temperature, humidity, and ventilation have a fantastic role in growing cannabis, all these factors end up causing the overall bud potency after harvesting. That said it’s coral to ensure that you subject the plants to the optimal rates given above on this guide. That way, you rest assured of plants free from molds and overdrying, which in the long run translates to highly potent yields
Chapter 11
Nutrients needed for each life phase
Just like humans, marijuana plants need specific nutrients to live a healthy, fruitful life. Different nutrients help the plant with performing specific tasks like growing roots or buds. When you buy fertilizer you will see on the packaging the N-P-K ratio. These are the macronutrients that stand for nitrogen, phosphorus, and potassium. These are vital in every marijuana plant’s life so that they can flourish. Most organic soil will take care of the micronutrients your plants will need.
N-P-K nutrients
Nitrogen is especially important during the vegetative phase of the plant’s life as it is largely responsible for a plant’s development. It aids in the production of chlorophyll and without it, the plant can’t create food from sunlight.
Phosphorus is a mobile nutrient within all plants including marijuana; it’s truly a primary nutrient for the plant. It helps with cell division, transporting amino acids throughout the plant, new tissue growth, and general health and energy.
Potassium like the other two have several jobs. It helps strengthen the plant’s immune system, it is needed for photosynthesis (how plants create food from sunlight), and potassium assists with osmoregulation. Osmoregulation is how the plant regulates the water in its cells.

Each life phase requires different nutrients
Marijuana plants need different amounts of eachof these nutrients during each distinct life phase. Very young marijuana seedlings that have just germinated do not need extra nutrients and giving them fertilizer too soon in life can cause nutrient burn since they are so fragile. You can begin giving your plant low levels of fertilizer when 3-4 sets of true leaves (not including the cotyledons) have grown. A good starter NPK ratio is 11-40-13.
You can begin adding a bit more fertilizer when 6-7 bladed leaves have developed. When your plant is fully in its vegetative phase then it will need plenty of Nitrogen. An NPK ratio of 19-5-20 will provide enough of the right nutrients to support its robust growth during this time.

When your marijuana plant starts the flowering stage it will again need a different ratio of fertilizer. Now your plants have finished building their support scaffolding. Less leaf and stem production will take place and nitrogen stores have been built up, therefore, less Nitrogen needs to be added. Phosphorus should be increased to support the production of buds along with potassium. An NPK ratio of 15-6-30 will provide your plant with the right amount of nutrients.
During the cannabis plant’s late bloom period you should change the NPK ratio to 0-27-27 to support the plant’s bud production. At 10-14 days before harvest, you should flush your plants using a few gallons of pure water with a pH of 6.0 to 6.8.

Every stage of the marijuana plant needs specific nutrients in order, to help grow and generate optimal health. If you are not sure of how to obtain correct ratios then buy fertilizers that have different ratios for every stage of your marijuana plant.
Chapter 12
Mildew, pests, and diseases
In this chapter of the Marijuana Growing Guide we're looking at negative situations you could come across when growing your plants. Nothing is worse than seeing your beautiful, healthy plants that you’ve taken such good care of getting infested by mildew, pests or diseases. Infestations, infections, and pathogens can quickly ruin your harvest since many times, it goes, unnoticed before it’s too late. It can even cause the hermaphrodite condition in your female plants if they have been stressed due to an attack. Whether you are growing indoors or outdoors, cannabis plants are susceptible to any of these things. However, indoor pests can do more harm very quickly since there are no predators and natural forces to disrupt them. Therefore you should take care of pests as soon as possible when growing indoors. Our Marijuana Grow Guide wouldn't be complete without an extensive chapter about this. Let’s take a look at some common mildew, pests, and diseases that affect marijuana.
White Powdery Mildew
White Powdery Mildew, a.k.a. White Mold or Oidium is a parasitic fungus (meaning it latches on to other organisms and takes nutrients from them). This mildew is from the Erysiphales family and attacks the above-ground parts of the plant.
Unfortunately, these mildew spores get around quite easily being carried around through air ventilation systems, the wind, your pets, even you! The spores stay idle until the environmental factors are perfect for it to start growing.
Once they lay down on their host leaf they will grow rootlets. Warm temperatures and high humidity levels are ideal for the spores to latch on to your plant and start leaching on it. Overcrowding of your cannabis plants can also encourage this mildew to develop. When leaves of one plant are touching another plant’s leaves then it is highly likeable, to spread fast and easily. This makes it just that much more difficult to get rid of it. Young plants are higher at risk as it attacks them first.

Indoor and outdoor plants are both at risk of being affected by White Mold. It’s easily diagnosed. The first signs of it, before the powder begins to form, are small bumps that can be found on the top side of the infected leaves. After it develops on the leaves it moves inward toward the stems and then to your marijuana buds. Infected buds will smell damp. It will destroy the resin on your bud and make it completely useless and unable to smoke. Trust me, you don’t want to inhale these fungus spores! In the second phase, your marijuana leaves will turn yellow and end up drying out. You need to catch and stop Powdery Mildew before it starts to slow down photosynthesis in your plant causing it to ruin your harvest.
Luckily for all of us, it’s not only easily preventable but also treatable. Of course, it is advisable to take the necessary measures and prevent it from ever affecting your plants instead of having to treat it. When you first start off your plants or transplant them to their final location, give them plenty of room to grow and mature. Don’t let the plants grow to touch each other. You already decrease your chances of dealing with this mildew just by doing that alone.
It’s also important to water your plants at a time that they will be getting at least 5 hours of light afterward. UVC lightening is great to use if you’re growing indoors; it will prevent the mildew spores from going after your prized plants.
Trimming off your fan leaves that don’t get much direct sunlight may prevent mildew from attacking your plant because it takes away an optimal spot for it to land and starts growing rootlets. The added bonus in doing this is that it allows your plant to put more energy towards its other leaves and growing bud rather than upkeeping leaves that don’t get sunlight.
If you catch it on time, you can get rid of Powdery Mildew. All you really need are some things you probably already have at home. You will need 2 or 3 tablespoons of apple cider vinegar that has 5% acetic acid and a gallon of water. Mix it together and spray it on your plants. You can even do this before you actually have a mildew problem as a way to prevent it. Take care not to use too much vinegar as it can burn plants. If your mildew problem has progressed quite far then using an apple cider vinegar concentration of higher than 5% may be needed.
A mixture of milk and water is another easy way to fight against Powdery Mildew. Weekly spray your plants (when they are going to have light for a few hours) with the mixture of 1 part milk to 9 parts water. The reason why this strange concoction works for mildew is that milk’s protein reacts to sun and light and creates an antiseptic. You can increase the ratio of milk to water, but don’t go overboard as it can have adverse side effects.
If you’re dealing with infected plants, and you’re disposing of leaves or other affected trimmings, be sure to get rid of it in closed plastic bags as the spores can easily escape and manage to find their way to other plants.
Although Powdery Mildew may seem like a big and disgusting problem at first, it’s cheap and easy to fix. Just keep an eye on your plants and make sure to catch them before it spreads!
Spider Mites
Spider Mites can wreak havoc on your cannabis plants. They are a very common pest, especially when growing in soil. Let’s get to know these critters a bit better so you can hopefully prevent them from ever showing up. Spider mites are a disaster wrapped up in a tiny (they’re a mere 1/50th inch) package with eight legs. They’re not actually considered an insect, instead, they’re considered arachnids like spiders and they’re related to ticks and mites. Their oval bodies can be red and brown or yellow and green. Their color is dependent upon the species of spider mite. The two-spotted spider mite will have, obviously, two dark spots on its back. Its body is slightly transparent. They get the name “spider mite” from the web that they spin on your plants. Spider mites will creep up on you unnoticed until suddenly you see thousands devouring your plant. The appearing act is no magic trick either.

Their “magic” trick is the life cycle that allows them to reproduce at a bunny-high rate to quickly populate and dominate plants. In just 3 days spider mite eggs hatch. Only 5 days later they have already reached maturity and they are reproducing fast. Millions of eggs are laid within a month and this cycle continues and worsens unless you step in to take control. Females lay their eggs on the underside of leaves. When the eggs hatch it becomes a larva. These larvae have round bodies and at that point only have 3 pairs of legs. After feeding for a couple of days they find a good spot to molt into the first nymphal stage. At this stage of their life, they say no to a driver’s license but celebrate with a fourth pair of legs. After feeding for another couple of days, they go and molt into the second nymph. Then lastly, after feeding again and resting, they molt into the adult stage. After reaching this stage they can live 2 to 4 more weeks.
Because of their life cycles, it’s easy to believe that you killed off all the adult spider mites and fixed your infestation. However, the unmatured spider mites might still be feeding on your cannabis plant awaiting their next stage of life. The life source of the spider mite that drives it to attack your marijuana plant is chlorophyll. That’s the substance that plants need for photosynthesis. Spider mites use their sharp slender mouthparts to pierce your plant’s outer layer. When all these mites are attacking a leaf it causes a localized collapse of its mesophyll tissue. Only hours after this happens, the leaf or affected area will develop chlorotic spots causing the loss in productivity. Although spider mites can be found in any growing setup, they are most common in soil due to the dead organic matter. Your best setup against spider mites is a hydroponic system. To be successful in eradicating a spider mite infestation, you need to catch the problem early on. They can be difficult to notice at first because they’re so small and it may not be until your plants are covered in webs that you notice what’s happening. Do routine leaf inspections, especially on the underside of the leaf. When they start making colonies you will see fine “spider webs” between your precious leaves.
Look for small specks, sometimes yellow or white, on the leaves; these are the bite marks of the mite. If the infestation is bad then the entire plant will appear sickly and discolored. It will be worth it for you to take all the necessary precautions to avoid spider mites altogether. If you are going to bring new plants into your grow area then quarantine them for at least 2 weeks. Check them regularly, a handheld microscope comes in handy here. Keep your grow area clean; never have old leaves laying around. Let me repeat -keep it clean! It’s good to have fresh air circulating, but if the air is coming from outside then you should use a filter to keep bugs out.
Your room temperature also plays a part. Mites like it quite warm, so keep your room on the cooler side. Organic compost mulch provides beneficial mites that eat spider mites. Ladybugs also eat spider mites. You can buy them if you already have an infestation, but they’re useless in terms of prevention. There are some treatment options available if you need to go into battle with these mites. One fun thing to do is to vacuum those suckers right off the plant. Put the used vacuum bag in your freezer to kill them, then toss them out with the garbage.
You can also spray a mix of water and rubbing alcohol onto the plants. Use at least 40% water in the mix. A mix of 1 tablespoon bleach in a gallon of water sprayed onto the affected areas also work. Do one of these methods for a few days, and switch to another method if you had a bad infestation. Even when you think you’ve killed them all off, do it again a few times to kill the ones that may have just hatched. Spider mites are a nightmare, but if you take the necessary precautions and check regularly you can save your plants and enjoy the crop you work so hard for
Root Aphids
Root Aphids are like a returning thief in the night that continuously steals the life and vigor of your cannabis plant. Since they attack the root, they eat away at your dear plant unbeknownst to you. At first, you may notice some signs like stunted growth and droopy yellow leaves. This may lead you to think you have a nutrient deficiency but you will have to dig a bit deeper to find the true source of your plant’s problem. Where the Root Aphids have chomped on your marijuana roots it leaves the plant susceptible to fungal infections and dead spots.
You will have to inspect your plants closely to see if Root Aphids are your problem. These tiny buggers are only about 1mm small; so you may need to use a jeweler’s loupe or magnifying glass to see them. They come in various colors as their colors change depending on what they eat or their maturity. Their colors can range from yellow, red, green, and sometimes black and brown. If you are having a difficult time distinguishing whether or not the bug you’re spotting is a Root Aphid, then look for a white, waxy material on your plant’s roots that the aphids secrete. This is a sure-tell sign that they’ve infested your plant.

Root Aphids have pear-shaped bodies and “tailpipes” at the end of their abdomen. At a later life cycle, they can be mistaken for fungus gnats. These adaptable bugs can have varying life cycles. During the growing season, they reproduce offspring in the absence of a mate. During the wintertime, the female Root Aphids lay their eggs in the soil. During warm months the female will attach the eggs to leaves and stems where the hatchlings will fall to the ground and bore into the root. Once an infestation gets bad enough the night thieves move higher up the stem continuing to steal your plant’s life. Once they have killed off a plant, they will develop wings to find a new plant to attack.
Another tip of how you can detect if your outdoor cannabis plants are under attack by Root Aphids is if you notice a lot of ants around that area. Ants and Aphids have a quid pro quo kind of relationship. Ants will escort Aphids between plants, protecting them from predators. In return, the Aphids secrete a sugary substance that the ants like to feed on.
Most often than not, root aphids come from commercial soil. Therefore, you should only buy clean soil! Growers talk, so before you purchase soil ask around if any brand is being rumored to be infested with Aphids.
Now, if you’ve reached past the point of being able to prevent Root Aphids and they’re already munching away at your crop you should try to kill them with these methods. Beneficial nematodes can work very well to control Root Aphids. You are basically buying microscopic, non-segmented roundworms that kill many pests like Aphids.
You can buy nematodes at many garden centers. Nematodes are a biological and natural way to kill root aphids within a couple of days and they are harmless to people, animals, and plants. Fill up a spray bottle with water and put in the correct amount of nematodes as stated on the nematode package. Water the soil around your cannabis plant and spray the mixture onto the soil around the plant that is infested with Root Aphids. The nematodes will go into the soil and kill the pests in 24 to 72 hours. This will give you protection for months.
Another great natural insecticide is pyrethrum; it’s made with chrysanthemum flowers. It’s toxic to Root Aphids along with other harmful garden bugs. However, it’s safe to use around people and pets. All you have to do is spray the insecticide on the soil around the infested plant. Water the plant so that the pyrethrum sinks into thesoil. Within hours the pests will start to die. Wait for 12 hours until you water the plant again. You can spray your plants with pyrethrum every 2 or 3 weeks.
An infestation of Root Aphids is a horror to have. Preventing them is the best way to go. Keep a neat and tidy grow space and be wary of commercial soils.
Companion Planting for a Natural Pesticide
Often times we hear about the dangers of ingesting pesticides and chemicals. So, the idea of smoking, juicing, baking or vaping marijuana treated with poisonous substances should also set off red flags. In fact, many chemicals used on marijuana plants are intended only for lawns and other plants that are not meant to be ingested. Because marijuana is usually inhaled instead of eaten, the poisonous chemicals have a more direct route into the lungs and bloodstream. Therefore, you need to always carefully consider what you put on your plant.
Companion planting is a natural and economical way to increase the quality of your cannabis crop and minimize the damage from pests. It is basically just planting beneficial plants close to each other, but not so close that they complete for root space and other resources. Some plants give off chemicals and strong odors that will either deter pests or draw in beneficial predators. Other companion plants can add vital nutrients to the soil that will feed your marijuana plants with the nourishment they need.
Note to those of you with less than cannabis-friendly neighbors- companion planting can also simply be planting large, bushy plants around your precious crop to camouflage it from neighbors that are also considered pests. Care to cook up a killer pasta while growing? Well, start with basil then, because this delicious herb is a wonderful companion plant for cannabis. Its strong scent repels pests like beetles,flies, aphids, and thrips. It has also been suggested that basil increases oil production and improves the flavor of plants it’s planted nearby. Another herb that is beneficial to marijuana is dill; it has proven beneficial in repelling spider mites. Cilantro also combats spider mites along with potato beetles and aphids. More herbs like oregano and marjoram are not only an asset to your crop but also for that sweet little pasta dish. They can actually be planted close to your cannabis plant as they do not compete for root space. They will attract beneficial insects and they have been known to increase the yield of plants close to them.
Not only your nose and taste buds are being catered to, but there are also some for your eyes as well. The beautiful chrysanthemum flower contains pyrethrin which is a natural insecticide that can kill varieties of harmful insects along with damaging nematodes. Marigold flowers are a great asset as they have a very strong-smelling chemical that they release into the ground. Plants that are nearby will pick up the chemical that insects, like whiteflies, can taste. Other flowers like the foxglove and mullein attract Dicyphus Hesperus insects that eat spider mites, aphids, and whiteflies.
Even when these companion plants don’t necessarily repel all the insects, as a bonus they just might trick the pests into snacking on the companion plant instead of your cannabis crop, So, if you wish to avoid chemicals, consider choosing a buddy plant for your cannabis crop. It will appreciate having a companion on its side fighting the battles of bugs.
Root Rot
Root rot is a plant disease that is commonly caused by a fungus-like organism called Pythium. Although it is most often found in hydroponic systems, it can also affect plants that are in soil or other planting mediums. The same symptoms of root rot caused byoverwatering your cannabis plant can be found in root rot caused by Pythium. It will look like your plant has various kinds of nutrient deficiencies on its leaves. In a sense, it does because the roots cannot properly absorb the nutrients it needs even though those nutrients are actually abundant.

The plant will look stunted. Your leaves will become yellow, wilting, and slowly die out. One of the telltale signs of root rot is particularly slimy brown roots instead of the common healthy and firm white or off-white roots. But first and foremost, your number one sign will be the undeniable stench greeting you when you come to check on your plants. Pythium attacks stressed plants first; gaining entry into the plant by damaged plant tissues. Roots with injuries from insects can also provide an entry site for the pathogens through the feeding wounds. Pythium usually attacks the root tips first and then works its way upward in the root system.
Since root rot in hydroponic systems is the most common, let’s discuss how to prevent it from happening there. Disinfect all your growing equipment extremely thoroughly before you start growing a new crop every single time. Keep your area clean and free from dead leaves, roots, or other debris to prevent bacteria from growing. Sterilize equipment shared between tanks like pH meters. Use filtered water, or if you’re using well water or untreated water have it checked for microbes. Change your container’s water regularly to prevent stagnant old water from overproducing bacteria. Try to do this about once a week; don’t wait longer than 2 weeks to do it. The abundance of nutrients in the fresh batch of water will keep your plants happy. The water should have a stable pH of between 5.5 and 6.0.
Your reservoir should be around degrees 65-70F (or 18 to 21 Celsius) be sure to take notice that submerged pumps will increase the temperature of the water. Cover your reservoir to avoid light getting into it. Also, try to avoid transplanting from the soil into a hydroponic system. Dirt within the roots can be a haven for pathogens, so start with a soil-less medium after germination.
Follow these rules and you might actually stand a chance against having to fight off root rot. If you’re already fighting root rot then I’m sorry to say that in many cases it’s fatal and you’ll have to start a fresh batch. Although, if you’ve just noticed that your roots have a mild case of root rot then introduce fungicides created to treat Pythium into your system. There are some other debatable practices, that may help you if you are in a root-rot-rut. Some growers have had success with using hydrogen peroxide, others say it’s only a temporary solution and they prefer other store-bought root treatments. If you want to try the Hydrogen Peroxide treatment then take your plant out of the system and cut off damaged roots. Soak the roots in a container with a strong Hydrogen Peroxide solution repeatedly until the diseased parts have come off. You must sterilize your equipment before putting your plants back.
Your pots, hoses, reservoir, and everything else need to be sterilized with bleach or a strong peroxide solution and rinsed really well. When you are ready to put the plants back add an anti-Pythium and fresh nutrients to your reservoir. Keep your temperature on the low side and keep an eye on the plant for the next week to see if it’s growing new beautiful white and firm roots. If your cannabis plants are just not making a comeback then it’s time to say goodbye and learn from your mistakes. Remove all the affected plants; do not compost them as the Pythium microbes will continue to live in the roots of the infected plants.
Again, profusely sterilize the equipment, get rid of all the contaminated water, and don’t look back! Start afresh, you can do it, the next batch will be well worth it.
Chapter 13
Growing hydroponically
Hydroponics can look intimidating to the novice grower; like a scientist’s laboratory or something out of a sci-fi movie. However, the benefits of growing hydroponically should be considered when making the decision, of how to grow your plants.

What is hydroponic growing?
The word “hydroponic” comes from the Greek words ‘hydro’ meaning water and ‘ponos’ meaning labor. It’s a system of growing plants in a nutrient solution made up of water and fertilizer. I don’t mean you stick your plant in a flower vase and expect it to be a hydroponic plant; it’s a bit more complicated than that. It may either be with or without artificial growing mediums like perlite, gravel, rock wool, sand, or lava rocks to provide mechanical support.
When you provide your marijuana plant with exactly what it needs, when it needs it, and in the right amount it will inevitably grow wonderfully. Soil makes this a harder task as it is an ecosystem unto itself. It has to change bacteria, nutrient variety, and pH. Hydroponics makes it easier to take control of all of those things. You’ll need to bring your A-game when growing hydroponics because you are then responsible for providing your plants with all the nutrients they need.
Benefits of growing hydroponically
One of the main differences is that when plants are grown in a hydroponic system, as opposed to soil, the nutrients are placed in the water to feed the plant’s roots directly. This is why hydroponic systems produce crops that grow at a faster rate and produce greater yields. In fact, a hydroponic plant grows 30%-50% faster than a plant growing in soil when they’re grown under the same conditions. The plant’s roots don’t have to search for nutrients in the soil. Instead, all of that extra energy can go to bud production.
Because hydroponics are soilless, the plants are less likely to suffer from soil-born diseases, pests, and weeds. If a problem does occur it can be corrected more quickly when compared to growing in soil. Once a hydroponic system is set up and running it can be automated so that it takes minimum effort to maintain.

Disadvantages of hydroponic growing
With so many major advantages there are of course a few disadvantages as well. One of the advantages of hydroponics can also be a disadvantage. Because you are solely responsible for the nutrients the plants receive, you need to be well knowledgeable of the correct nutrients and amount needed to keep your plants growing. There is no room for error in this due to the fact, that the roots absorb the nutrients you give them directly. A nutrient mistake will show immediately. Not only will the mistake show, but problems can overtake plants more quickly since they often all share a reservoir.
The pH in hydroponic systems easily fluctuates so you will need to keep an extra eye on that. Another con that soil growers like to claim is that hydro-grown cannabis doesn’t taste as good as when it’s grown in nature. Overall, growing hydroponically may not be the easiest for beginners to take on; it takes more knowledge than growing in soil.
Deep Water Culture
For those of you just starting off in the wonderful world of hydroponics, a Deep Water Culture system may be the easiest and cheapest way to go. The idea is that you’re growing your plants in aerated water. All that is needed is a container, lid, pump and net pot. In the container you will put your nutrient solution; normally about 3-4 gallons. The lid will support a single plant that is put in a net pot. The roots will grow out of the net pot down into the nutrient solution. Put an airstone in the container to keep bubbling the water to increase oxygen levels. An airstone is crucial to this system as stagnant water can cause root rot and is the perfect breeding ground for parasites. Every container must also be airtight in order, to prevent algae from growing.
Ebb and Flow/Flood and Drain
One of the most popular hydroponic systems is the Ebb and Flow/Flood and Drain. For this setup you will need flood tables, pumps to feed the plants water and nutrients, reservoirs, and a growing medium like Rockwool. This method includes soaking the plant’s roots in the nutrient solution for a period of time then draining the solution leaving the roots in the open air. The process is repeated many times a day. Some growers put their pumps on timers for when to flood the tables and then drain the solution into the reservoir again.
Other growers just drain the nutrient solution, wasting it, and putting in a new nutrient solution for the following time. The good thing about this system is that the water doesn’t become stagnant long enough for parasite infestations or root rot to occur. Hydroponic systems are a great way to expand your horizons as a grower. You will be impressed with your garden after seeing the difference between growing in soil to grow hydroponically. If you do decide to give it a try then make sure you are financially capable of covering the costs and you are confident in the knowledge you have of growing hydroponically.
Chapter 14
Pruning, Topping, Super-Cropping
It is very little we growers won’t do to ensure that we get the best yields when harvesting our crops. Although pruning sounds like something that happens to our fingers when we stay in the water for too long, it is, a very good way to boost up your yields. Pruning basically means manipulating your marijuana plant by cutting, bending, or tied, it to grow a specific way that will give you more and better buds.
Indoors, pruning should take place between 10 and 15 days before you force flowering. If you are growing outdoors, then you should start pruning a few weeks before you expect your plant to start flowering. Tall plants can waste a lot of nutrients and energy supplying water throughout a long stem. Instead of your plant wasting so much energy growing a long flimsy stalk, it could have put more energy into growing you a big fat bud. Don’t start just whacking off leaves and branches!

These kinds of things need to be carefully planned out. You’re going to want to prune to stimulate branching since the ends of the branches are where the largest buds grow. Prune to avoid having tall and lanky marijuana plants using the topping method. Not only does it increase yields but it decreases your plant’s height to make for a stronger and sturdier stem.
Topping
The topping method is cutting off the top shoot. Let your plant grow to at least 5 nodes and cut the stem just above the second true node. The node where the cotyledons (the first two baby-leaves) attach does not count as a true node. Don’t rush to prune your plant with this method as the longer you wait the more quickly your plant will be able to recover due to its larger photosynthesis area. I know it seems counter-effective to cut the top off of your plant that you are eager to grow, but it will divide its energy to create multiple colas for you.

As new shoots form after the main stem has been topped, you can repeatedly top new shoots as they form. This will turn two new tops into four, and then you can turn four into eight tops. Make sure to allow at least one internode to form with a set of leaves and cut just above that each time.
Once the main stem has been topped it is possible to repeatedly top new shoots as they form. Once the lateral branches are established it is also possible to top these, encouraging an overall bushy structure. Since the branching takes place near the top of the plant the new emerging tops will get all the wonderful light and grow many medium buds.
It is a bad idea to top your plants during the flowering phase. During the flowering phase, a plant completely changes the way it grows and its nutrient requirements are also different than before flowering. Topping your plant as its flowering will cause it to stress and it will give you smaller yields. It will force it to put its energy into repair instead of growing great big beautiful buds.
Super cropping
Another pruning technique to increase your yields is called super cropping. Unlike topping, it does not actually include cutting anything off of your plant. It consists of putting your plant through some stress to increase the number of tops. It will push the lower growth higher and wider so that it will flower. Not only can this method be done on almost all plants but it can be done several times during the vegetative process. The nutrients will work twice as hard to produce higher yields in areas that would otherwise not be productive.
The process is really simple without any tools needed. You can start super cropping when your plant is in the third week of its vegetation phase. Choose a point on your plant close to the first and third node sets. Take your thumb and forefinger and squeeze the stem causing it to create a 90-degree angle. The tips should end up folded over. Make sure you don’t actually break the stem off, just create a kink and let it flop over. Soon enough the “kinked” stem will start to heal, and luckily this process doesn’t dramatically slow down the growth of your plant. Breaking the tissue down will cause it to grow back stronger and ultimately end up giving you bigger and more potent yields.
Prune responsibly. Don’t get overzealous and prune too much too fast. Keep in mind that you are putting your plant under some extra stress when you do it and it must spend extra energy to heal itself. It also could make it more susceptible to insects and fungi. So before you start pruning, make sure your plant is in tip-top shape and that it is not already battling pests.
Now go and enjoy watching a forest emerge with your new pruning skills!

Chapter 15
Harvesting
Have you ever coughed so hard after taking a hit that you feel like you’re on the verge of bronchitis? Or what about rolled up a doobie and after toking on it realized you have a fertilizer taste in your mouth? This could be because you didn’t flush your plants before harvest.
Flushing your marijuana plant is kind of like giving it a detox from all the nutrient salts and nourishing chemicals that may have been stored in your cannabis plants’ tissues. Your plant stores these nutrients in their leaves, in case they don’t get fed again for a while. Since we’re all good-loving plant parents and without fail (if ur smart that is) continue to feed them, they don’t actually need all the stored-up food. This is where our loving care comes in because they can’t get rid of it without us. Your plants growing medium, the soil, needs to get flushed to get rid of the excess nutrient buildup, and then and only then will your plant use up the stored nutrients when it’s not fed more incoming nutrients. However important the fertilizers are, as important is it to clean up after a few months of dinner -so to speak. It’s this nutrient buildup that causes your smoke to be harsh and bad tasting.
After buying some bud you can tell if it’s been flushed or not simply by lighting it up! If the joint is hard to light and the ash is dark it’s probably not been flushed. Your ash should be white-gray and inhaling should be like it’s meant to be Mmmm smooth and tasty.
When to flush your plant You’re going to want to wait to start the flushing until it’s the early end of the harvest window; around the time when you can just practically harvest it already. It’s a big mistake to start flushing too early as it stunts the growth because the buds are not getting the right amount of nutrients to develop properly. If it doesn’t get the right amount of nutrients during the most critical parts of the flowering stage then you’re putting the quality and potency at stake. If you’re too hasty with starting the flush, and realize afterward that your plants still need a couple of weeks to mature fully, then you have a situation on your hands. You would have to decide whether to harvest it early, continue to flush (which can cause nutrient deficiency), or going back to using nutrients.
The entire flushing will take 2 weeks if you want it done thoroughly, but if you don’t think you need to do it for so long, aim for at least 10 days. Let’s first look at flushing when you are using soil as your medium. First off, put your pots in a draining tray to catch the runoff water. You can also place them in a large enough sink if you have it. Then, using pure water with a pH of 6.0 to 6.8 water your plants with a few gallons of water. Use a shop-vac to suck up the water from the draining tray. Avoid letting your plant sit in the runoff water for too long as the nutrients can get leached in again and that will just make the whole process pointless.
Flushing in a hydroponic system The idea stays basically the same if you’re using a hydro setup. Unplug your water pump and drain all the water. After detaching the hoses from the bucket, sterilize your system. Now you can add the water back into the reservoir. Don’t forget that your water should have a pH between 5.5 and 6.5. Now you can reattach the hoses and let the water circulate for 2-3 hours. Next, you should repeat the process of draining your system and adding new water. Allow that water to circulate in your system until the following day. Replace the water again for the 3rd time and keep this water circulating for the next 10-14 days. Keep an eye on your pH throughout the whole thing.
If you go through with flushing your plants before harvest you will certainly thank me; toking on your clean and wonderfully self-grown bud will be smoother than hot butter… Enjoy
Why trimming is important
Harvest time is fast approaching and no one can be happier than the grower that has spent months taking care of his green babies to produce top-shelf bud. However, the job isn’t over yet, another hurdle has to be jumped before reaping the rewards: trimming. Trimming is an important aspect of harvesting because it can make such a great impact on the look, potency, and smoke of the final bud. Well-trimmed bud will make buyers excited and it will sell much more quickly because it is aesthetically pleasing and shows off the beauty of the bud. Badly trimmed bud does not give off a good first impression and brings down the entire quality of the bud. Poorly trimmed bud dilutes the overall potency of the flower as the less potent leaves are wrapping around the outside of the bud and smoking it will feel harsher. If you are simply growing a few plants for your own personal use then by all means trim, or don’t trim, to your liking. Although, if you wanted to sell some bud to a local dispensary then you should do a good job of trimming to make sure your bud looks like it belongs on the top shelf.
Trimming methods
There are two methods to choose from when it comes to trimming cannabis. One grower will swear on one method and another grower will convince you the other method is better. Some growers trim their marijuana before drying and this is called a “wet trim” as the leaves are still wet when the trimming process takes place. The other method is known as a “dry trim”. This is when you trim the leaves after the bud has already dried before you trim off the sugar leaves. It all comes down to personal preference although the wet trim seems to be the most popular method.
For both methods, you will practically need the same equipment: good quality pruning scissors, larger pruning shears, rubbing alcohol (to clean the sticky residue off your scissors), rubber gloves, clean work area, and containers to organize the trimmed buds, untrimmed buds, and sugar leaves or “trim”.
Let’s first talk about a wet trim. The pros of this method are that there is only one round of trimming, so when it dries, the buds can go directly into a jar for curing. You can get a closer trim, fewer trichomes are lost, and some say it is faster.
Wet trimming
To begin your wet trim you will use your large shears to cut the branches off the cannabis plant. You can hang your freshly cut buds on a line so they don’t get squashed in the container near your workstation. You want to first remove the fan leaves starting at the base. The fan leaves will just be normal leaves without trichomes on them. You can save these fan leaves if you grow organically without pesticides and use them for juicing.
After the fan leaves are removed it’s time to get up close and personal and start trimming the smaller sugar leaves with the trichomes on them with your smaller scissors. You should do this over a baking tray or bowl to catch the small leaves and extra trim so that you can save them for making edibles, topicals, or hash. You will cut all around the bud to reveal the cannabis nugget. During this step, you want to pay close attention to how you are sculpting it as this will be the look of your final product.
Now that your final product is revealed you can cut the bud off the stalk and let it dry on a mesh rack or leave it on the branch and hang it to dry. Your drying environment should be dark and have some airflow like from a fan. Avoid direct wind to your buds. You can put a dehumidifier in the room for a nice touch. Keep an eye on your harvest every day. After about 5 to 7 days your harvest will be dry enough for curing.
Dry trimming
The dry trim has a couple of its own pros: it slows down the drying process and the excess leaves protect the cannabis nugget. The process of dry trimming begins the same as the wet trimming so you will cut down the branches and remove the fan leaves. Now you will hang up the branches in a drying space that is dry, dark, and cool with nice airflow. Don’t overcrowd this area as that may cause mold or mildew to grow. After 5 to 7 days you can check to see if they are ready for more trimming by bending the stalk. If the stalk snaps then they are ready for the next step. The leaves have dried and created a shell around the nugget. You should begin trimming the sugar leaves off over a baking tray to sculpt the bud into its final product. The trichomes will be delicate so be careful with every cut. These buds can now be put into a jar for curing.
Now you have a great supply of beautiful nuggets and a stash of trim leftovers to make into edibles or tinctures. Whether you choose to go with a wet trim or a dry trim the most important aspect is doing a good job trimming so that your glorious nuggets will look their best.
Benefits of drying
By the time you are ready to harvest your bud, you have already gone through an incredible journey taking care of your plants in the best way possible by catering to their every need and warding off dangers of pests and diseases. You have raised them well, but you are not done yet. You are still a few steps away from lighting up and reaping the rewards of your crop. Correctly drying your bud is critical and needs to be done correctly to give you the best bang out of each bud.
You can get the most THC-potent smoke if you dry and cure cannabis correctly. If done incorrectly, the potency can largely diminish. The level of THC that the plant can ultimately reach is determined by its genetics, but correctly drying and curing will give you the highest THC levels genetically possible.
How drying increases potency
When marijuana buds are drying, the THC from its non-psychoactive, crude, acidic form gets converted into its psychoactive neutral form. Thus, if you try to smoke weed that hasn’t been dried yet it will not be very potent. Drying converts at least 70% of the newly harvested plant into water vapor among other gases. After hanging the plant to dry, the transport of fluids inside the plant continues although at a slower rate. The tiny openings under the leaves, the stomata, close after harvest, and drying slows down because hardly any water vapor escapes. As the plant dries its natural processes come to an end.
How to dry your buds
Although removing leaves and stems during harvest speeds up the drying process, moisture content becomes uneven. Quick-drying methods also trap chlorophylls, starches, and nitrates inside the plant tissue which affects the burn and taste. Drying marijuana slowly is the way to go. This way the moisture evaporates evenly into the air and you get evenly drying buds with minimal THC decomposition. As the pigments break down taste and aroma improve. Slow drying allows enough time for the pigments to deteriorate.
One of the best ways to allow this process to take place is by hanging entire plants upside down to dry. Don’t allow the plants to touch each other as this increases the chance of mold forming. The ideal situation to dry your plants is to keep a steady temperature of 65-75 degrees Fahrenheit (18-24 degrees Celsius) and avoid putting fans directly on the plant as that will cause it to dry unevenly. The humidity should be kept between 45% and 55%.
Your drying room should be quite dark as direct sunlight degrades the THC. The drying time of your bud will depend on temperature, humidity, and bud density. By the end of a week, you should be able to start curing your buds, but really big and dense buds might take a few days longer. You can tell if your buds are ready to be cured by squeezing the buds to check their moisture content. The bud should be dry but not brittle. Also, check the stem; bend it, if it breaks (not just bends) then it’s ready for curing.
If your stockpile of weed is meager and you’re going to run out of smoke before you think your new harvest will be done (or you’re just dying for a sample) then there are a few things you can do to speed up the process. It will not ensure that your bud has reached its full potential, but I understand your exigency.
You can try to microwave your buds on a plate for 10 seconds at a time. Continue to turn your buds around every time the 10 seconds are over. Repeat it as necessary but it should be done quickly. It’s important to have your microwave on 50% or less- not on “high”. Otherwise, your bud will start to crackle and pop and your whole house will smell terrible.
You’ve been waiting for months for this moment. All your hard work is finally getting paid off; you’re ready to harvest your crop. Harvesting alone won’t do the trick, nor does just drying out your beloved plants. Curing is the way to go to fully enjoy the fruits of your labor. You don’t want mold to stand a chance, against ruining your crop, and of course, you want the maximum flavor and potency you can achieve.
Methods for curing
Sure, there are fast ways to cure your buds like using a microwave, but save the microwave for your popcorn as this method using irradiated heat can reduce the quality and potency of the smoke.
The decarboxylation process that turns THCA into THC is what will be taking place as you dry and cure your crop.
My preferred method of drying crops is air drying. I like to hang my buds upside down with a fan in the room circulating the air until they are ready to be cured. Make sure you don’t let them get too dry; you want them to be moist enough to be flexible but still dry so they don’t get moldy.
The next step requires some patience, but you will be rewarded with flavorful tastes and gratifying aromas. The slow cure takes a few weeks. Get out your mason jars and fill them to the top without stuffing them. Put the jars in a dark place that doesn’t get too hot. Every week shake the jars to get the buds moving around and open the jars for half an hour or so. Try your buds at different stages to find out what you like.
Curing your crop is worth the time and effort as your bud will reward you with its taste and potency.
Storage of seeds
Storing marijuana seeds shouldn’t be a difficult subject matter, yet every toking Tom will tell you their method is the best only to come out with half your seeds ending up unusable. Often times storage methods are not considered serious enough. Yet, when you spend enough dough on your favorite strains, you don’t want any of them ends up barren due to a silly mistake that you’ve made.
Now, I know many of you have never explored using your green thumb to plant anything until you’ve considered growing your own diggity dank nugs, but let’s take it back to 3rd-grade science. We all know that in order, for a seed to germinate it needs a few vital things. Like the saying goes “April showers bring May flowers.” It needs moisture, light, and warm temperatures. So, if you want to keep your seeds from germinating avoid all those things. Sounds simple enough, right?
How to store your seeds
So to break it down, you’re going to need an airtight container like a film canister for example.
Then, put a few silica gel beads or rice grains in your container to soak up any accidental moisture. The humidity should be no more than 10%. Put your seeds in a tiny envelope, bag, or ideally vacuum packed, and then put it in your airtight container. Make sure to label what’s inside each container with a date on it as well. You don’t want to take your seeds out unless you have to; temperature changes and exposure to light, is not good for viability in the long run. Now you’re ready to put your babies away for planting next year. Avoid putting them in the fridge door where the temperature tends to vary, better in a back corner somewhere.
I understand that sometimes you live with other people and you don’t want them to get their grubby little fingers on your seeds. If you don’t want to have a mysterious canister in the back of your fridge labeled “Nothing in this canister is worth dying for” then you can take a riskier option and store your seeds in a closet, under your bed, someplace dark and protected. However, these places may be more susceptible to temperature change and the #1 enemy of seed storage: humidity. In this case, you must be adamant when it comes to moisture control.
Store your cannabis seeds properly and you can sleep well at night knowing that next year and maybe a few years after the next you can still enjoy growing your most beloved strain of seeds.
Subscribe to the AMS newsletter for more info and the best deals
Growing your precious cannabis seeds into healthy plants takes time and experience. As an experienced Seed Bank, since 1996, we're more than happy to help you on your growing adventures. Hopefully, we've answered all your questions regarding how to grow marijuana with this Marijuana Growing Guide.
Get useful information and the best deals by subscribing to our newsletter. Want to get in contact for more information in regards to how to grow your marijuana from seed? Get in contact with us!